For the complete documentation index, see llms.txt. This page is also available as Markdown.

Member Management

What Is a Member?

A Member is a user within an organization who gains corresponding permissions and resources by being assigned to different roles.

Simple explanation:

A member is like a "company employee." Each employee can join different departments (roles) and receive corresponding work permissions based on their department.


Member Type Descriptions

Member Type
Description
Permission Scope

Owner

Defaults to the organization creator

Has full access to all resources Can manage organization settings and role permissions

Regular Member

A member within a role

Has the permissions and resources of assigned roles, such as Q&A, conversation permissions, etc.

Simple explanation:

  • Owner = The company's general manager or system administrator who can manage everything

  • Regular Member = A company employee with different permissions based on their department (role)

For detailed role permission settings, see Role Permission Management.


Basic Operations

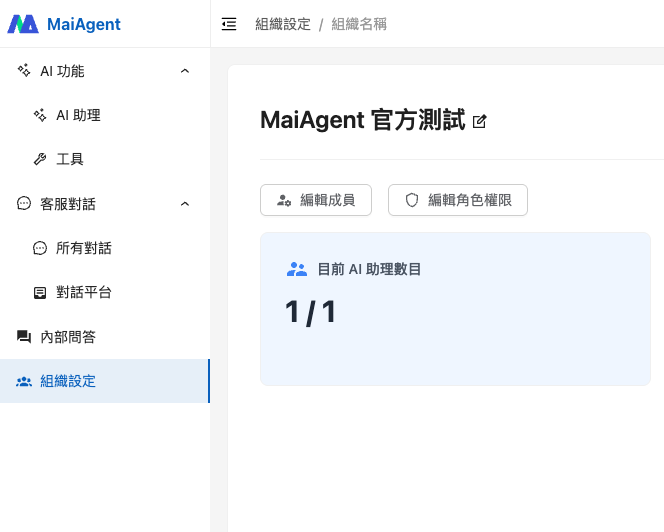
Accessing the Member Management Interface

  1. Log in to the MaiAgent platform

  2. Click "Organization Settings" from the left menu

  3. Click "Organization Overview"

  4. Click the "Edit Members" button to enter the member management page

How to Choose a Method for Adding Members

MaiAgent provides three ways to add members to an organization. Choose the most suitable method for your situation:

Quick Guide

  • The person already has a MaiAgent account → Use "Add Member"

  • The person does not have a MaiAgent account and you have a list → Use "Email Invitation"

  • The person does not have a MaiAgent account and you want self-service registration → Use "Organization Invitation Link"


Add Member (Already Has a MaiAgent Account)

When the member you want to add already has a MaiAgent account, you can add them to the organization directly via email.

Steps:

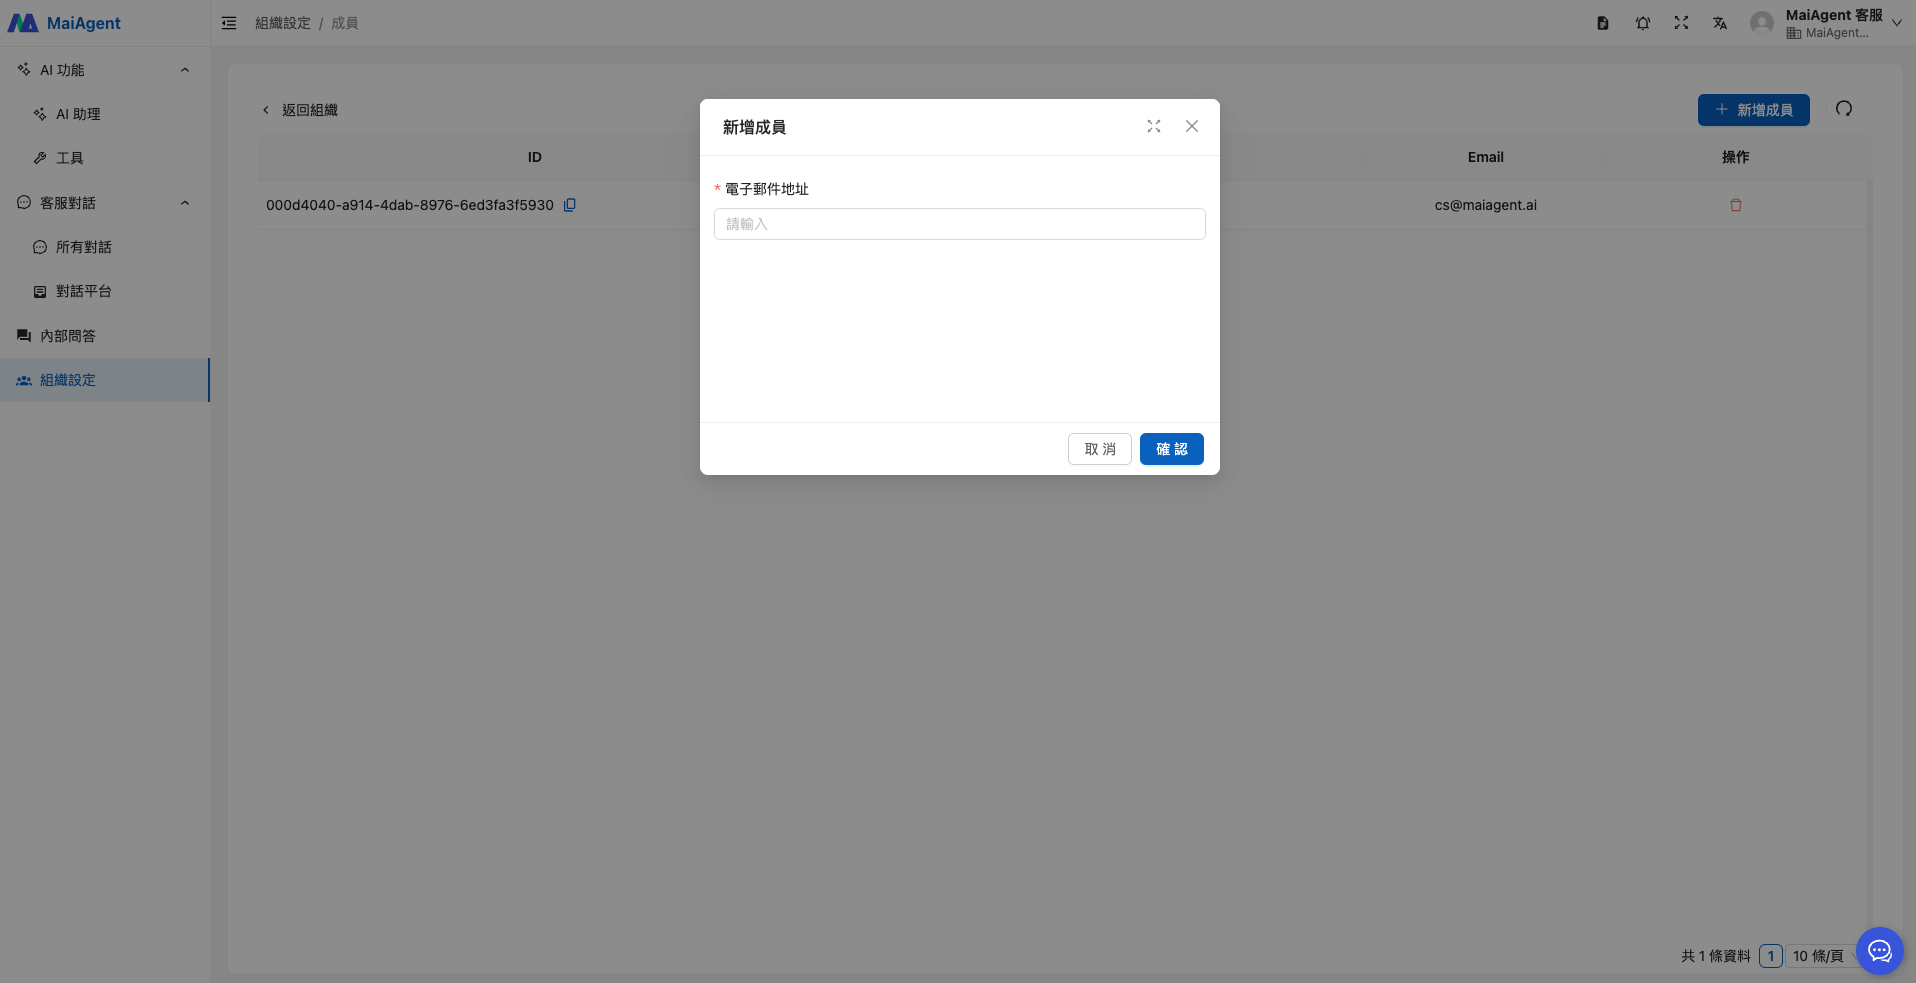
  1. On the member management page, click "Edit Members"

  2. Click "Add Member"

  3. Enter the user's email

  4. After confirmation, the member is added to the organization

Edit Members page

Email Invitation (No Account, Have a List)

When the members you want to invite do not yet have a MaiAgent account and you already have their email list, you can send invitation emails through the Email Invitation feature.

Step 1: Access the invitation feature

  1. From the left menu, click "Organization Settings" > "Organization Overview"

  2. Click the "Invitation Status" tab

  3. Click the "Invite New Member" button in the upper right

Step 2: Configure invitation details

  1. Select the "Invite via Email" tab

  2. Select roles (multiple selection allowed): Set the default roles for invitees after they join the organization

  3. Set invitation expiration: Choose from 1 day, 3 days, 7 days, 14 days, 30 days, 90 days, or a custom date

Step 3: Enter invitee emails

Enter the invitee's email address in the email field and click "Add" to add them to the invitation list.

After adding, the email will appear in the "Added" list.

Step 4: Bulk enter multiple emails (optional)

To invite multiple members at once, click "Bulk Import" to switch to bulk input mode, where you can paste multiple emails (separated by commas, semicolons, or line breaks).

Step 5: Send invitations

After confirming the invitation list is correct, click "Send Invitation". The system will send invitation emails to all invitees.

Invitee Process

Invitees will receive an invitation email. After clicking the link in the email, they will be directed to the registration page. Once registration is complete, they will automatically join your organization and receive the specified role permissions.

Invitee Registration Guide

Below is the complete registration process for invitees after receiving an invitation email. You can share this section with invitees for reference.

Step 1: Open the invitation email

Go to your email inbox and find the invitation email sent by no-reply@maiagent.ai with the subject "You are invited to join MaiAgent." The email will show the name and contact email of the organization administrator who invited you. After confirming the information is correct, click the "Register Now" button in the email.

Invitation email example

Step 2: Fill in registration information

After clicking "Register Now," your browser will redirect to the MaiAgent registration page. Fill in the following information:

Registration page
  • Full Name: Enter your full name

  • Company Name: Enter your company's full name

  • Company Email: Enter your company email (same as the one that received the invitation)

  • Password: Set a login password (at least 8 characters recommended, including uppercase and lowercase letters + numbers + special characters)

  • Confirm Password: Re-enter the same password to confirm

  • Check "I have read and agree to the Privacy Policy and Terms of Service"

After completing the form, click the "Register" button at the bottom of the page to submit.

Step 3: Log in and join the organization

After successful registration, the system will automatically redirect to the login page. Log in using the company email and password you just registered with, and you will successfully join the organization and start using MaiAgent.


When the members you want to invite do not yet have a MaiAgent account and you want to let everyone register on their own, you can generate an invitation link to share with invitees.

Step 1: Generate an invitation link

  1. Click the "Invite New Member" button

  2. Select the "Generate Invitation Link" tab

  3. Select roles (multiple selection allowed): Set the default roles for users who register through this link

  4. Set invitation expiration

  5. (Optional) Enter a link description for easier identification and management

  6. Click "Generate Invitation Link"

Step 2: Copy and share the link

After the link is generated, click "Copy Link" to copy the invitation link to your clipboard. Share it with invitees via email, messaging apps, or internal announcements.

Step 3: Invitees complete registration

Invitees click the link to access the MaiAgent registration page. After filling in basic information and completing registration, they automatically join your organization.


Remove Member

Use the "Delete" button to remove a member from the organization.

Assign Roles to Members

After members join the organization, you can assign different roles to each member, granting them corresponding permissions based on their role. For detailed settings, see Role Permission Management.


Advanced Operations: Batch Member and Permission Management

When do you need batch operations?

When you need to add a large number of members at once (e.g., 50 new employees) or assign roles to multiple employees, batch features can save significant time.

MaiAgent provides powerful batch management features, suitable for scenarios requiring large-scale member additions or management. Through Excel file import, you can add multiple members and assign roles in one operation, greatly improving management efficiency.

Batch Feature Entry Point

On the member management page, click the "Batch Features" button in the upper right corner:


Batch Add Members to Organization

This feature adds multiple members to the organization at once via an Excel file.

Steps:

  1. Download template: Click "Download Template" to get the Excel template file

  2. Edit template: Fill in member emails (required field) in the template

  3. Upload file: Drag and drop or click to upload the edited file

  4. Execute import: Click "Upload and Execute" to complete the batch addition

Excel File Format

Field Name
Required
Description

Name

Optional

Member display name; uses the email prefix if not provided

Email(required)

✅ Required

Member's email address

Example File Content

Name
Email(required)

Xiao Ming Wang

ming.wang@company.com

Xiao Hua Li

hua.li@company.com

David Zhang

david.zhang@company.com

john@company.com

Case Study

An enterprise needs to add 50 new employees to the MaiAgent organization:

  1. The IT administrator exports the employee list (including names and emails) from the HR system

  2. Formats the data into the Excel format described above

  3. After uploading, the system will:

    • For employees with existing MaiAgent accounts: Add them directly to the organization

    • For employees without accounts: Automatically create accounts and add them to the organization

  4. All new members automatically receive "Default Role" permissions


Batch Add Role Members

This feature batch-assigns roles to multiple members, enabling automatic permission distribution.

Steps:

  1. Download template: Click "Download Upload Template" to get the Excel template

  2. Download reference data (optional): Click "Download Current Member Role Assignments" to view existing configurations

  3. Edit template:

    • Fill in member emails

    • Fill in the role IDs to assign

  4. Upload file: Drag and drop or click to upload the edited file

  5. Execute import: Click "Upload and Execute" to complete batch role assignment

Excel File Format

Field Name
Required
Description

Name

Optional

Member display name; uses the email prefix if not provided

Email(required)

✅ Required

Member's email address

Group_id(required)

✅ Required

Role ID to assign (UUID format)

Group_name

Optional

Role name (for reference only; the system uses Group_id)

How to get role IDs?

Click "Download Current Member Role Assignments" to export a reference file containing all role IDs, or go to the Role Permission Management page to view each role's ID.

Example File Content

Name
Email(required)
Group_id(required)
Group_name

Xiao Ming Wang

ming.wang@company.com

4e368ab4-c543-48a2-bbb8-f6f5a0bf6c61

Product Department

Xiao Ming Wang

ming.wang@company.com

7a2b3c4d-e5f6-7890-abcd-ef1234567890

AI Assistant Admin

Xiao Hua Li

hua.li@company.com

4e368ab4-c543-48a2-bbb8-f6f5a0bf6c61

Product Department

David Zhang

david.zhang@company.com

8b9c0d1e-f2a3-4567-89ab-cdef01234567

R&D Department

New Employee

new.employee@company.com

4e368ab4-c543-48a2-bbb8-f6f5a0bf6c61

Product Department


Further Reading

Last updated

Was this helpful?