For the complete documentation index, see llms.txt. This page is also available as Markdown.

Member Credits Quota Management

Set personal Credits spending caps for each member to effectively manage organizational budget allocation

Organization administrators can set a personal Credits spending cap (Quota) and validity period for each member, making costs during events or specific projects transparent and controllable.

Only available for organizations using the Credits billing system. If your organization has not yet switched to the Credits system, this feature will not be displayed. See Credits Billing System for details.

Core Concept

A Quota is a spending ceiling, not a pre-funded sub-wallet.

The organization's Credits wallet remains the sole funding pool. A Quota only limits how many Credits a specific member can consume from the organization wallet. Distributing a Quota does not affect the organization balance, and Quota expiration does not affect the balance either — there is no concept of "returning" Credits.

Use Cases

  • An enterprise hosts an event and grants external users platform access, needing to control per-person spending caps

  • Different departments set different personal quotas based on their budgets

  • Limit a specific account's usage during a validity period, with automatic enforcement after expiration


Administrator Operations

Accessing the Quota Allocation Page

  1. Click Organization Settings from the left menu

  2. Click Credits

  3. Switch to the Quota Allocation tab

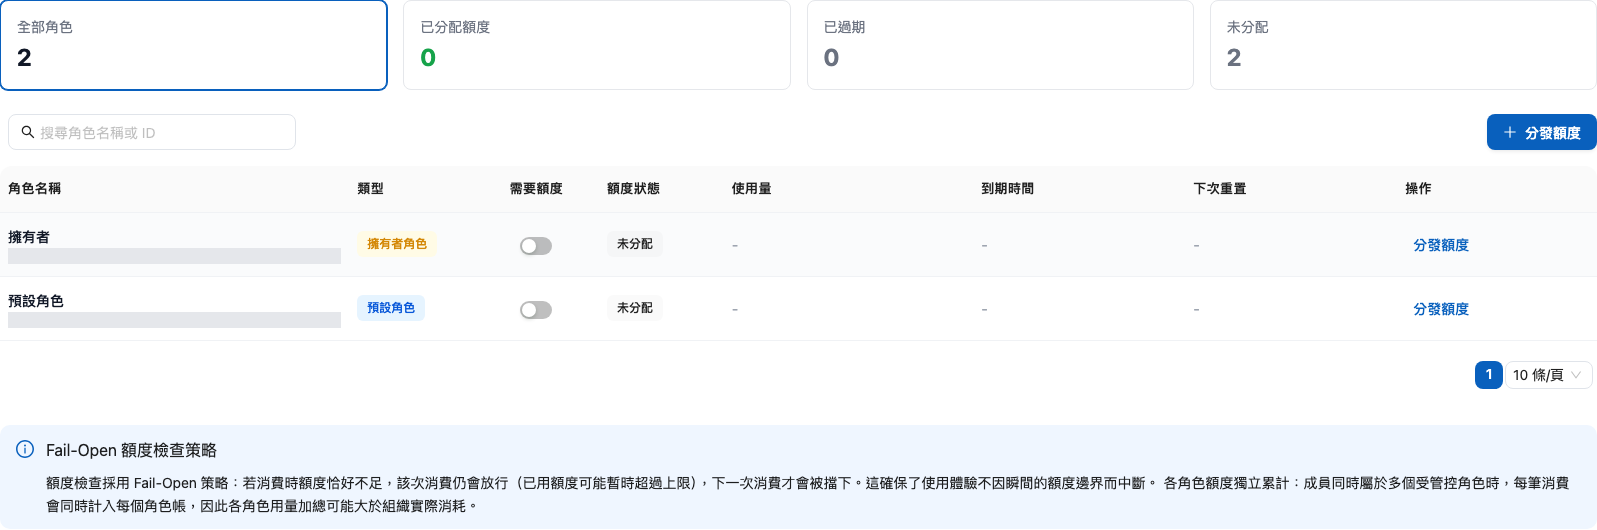
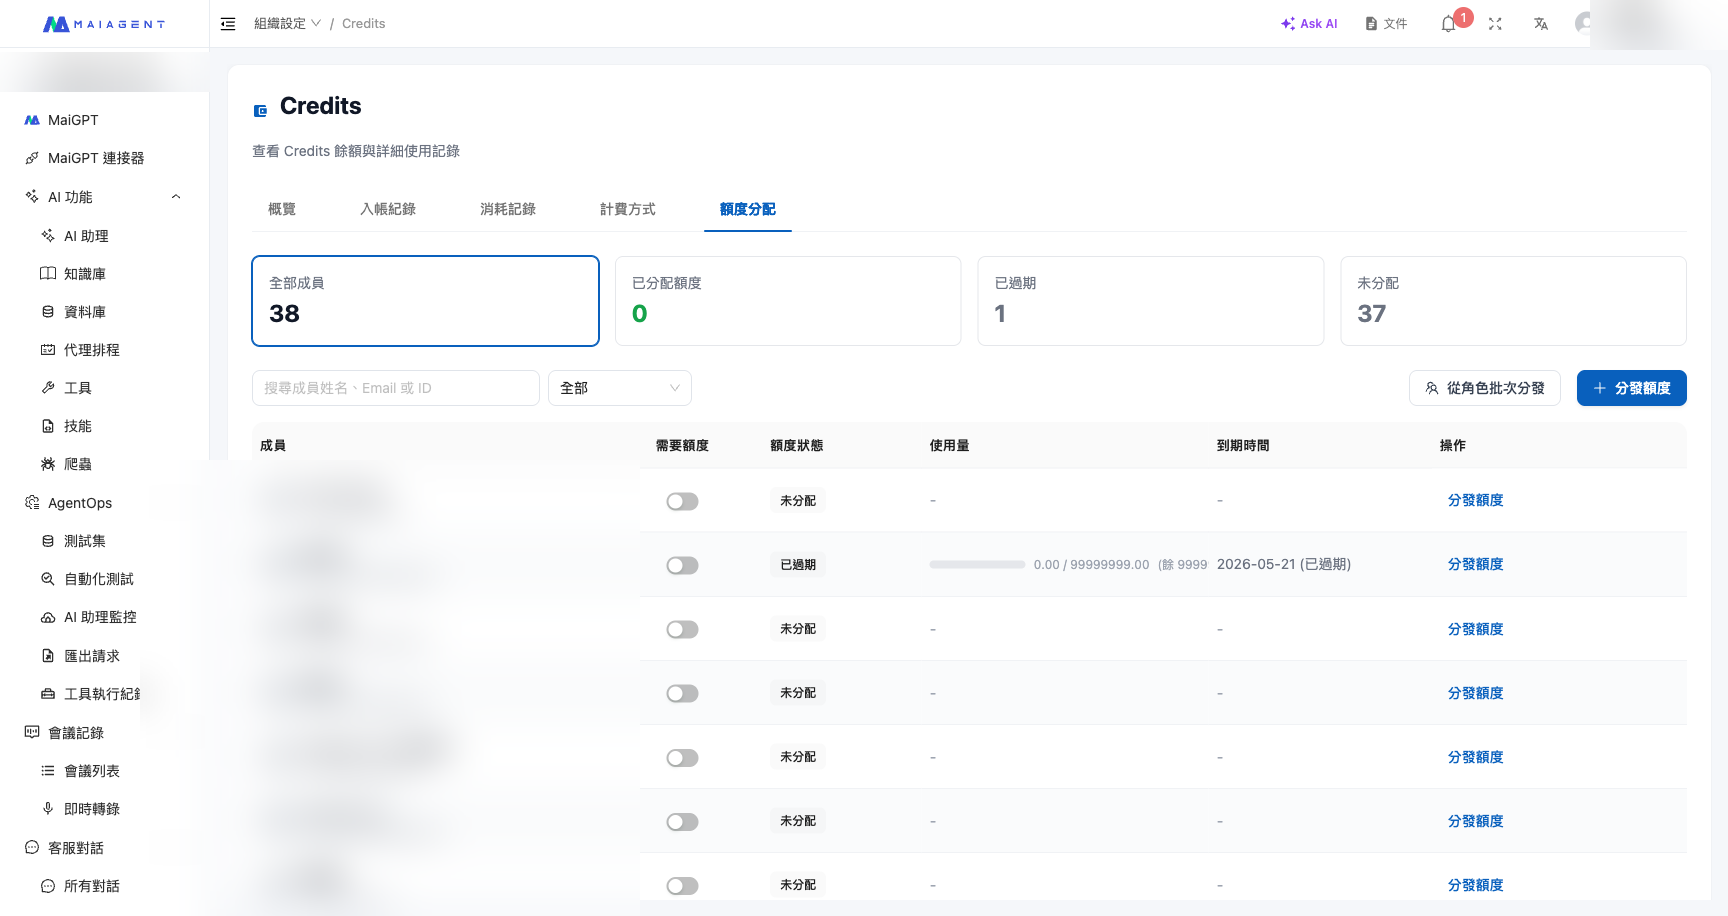
The page displays the quota status for all members, including summary cards (All Members, Allocated Quotas, Expired, Unassigned) and progress bars.

Quota Allocation page overview
Quota Allocation tab: Summary cards and member list

Distribute Quota

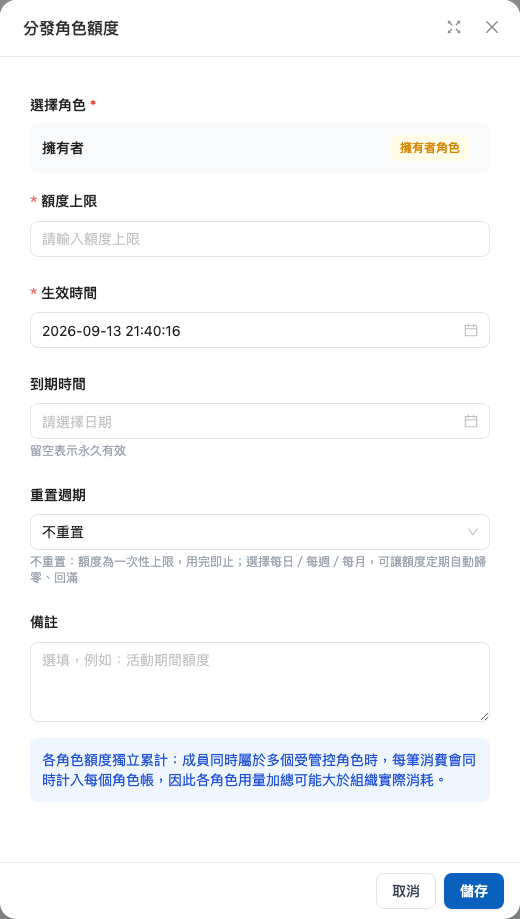
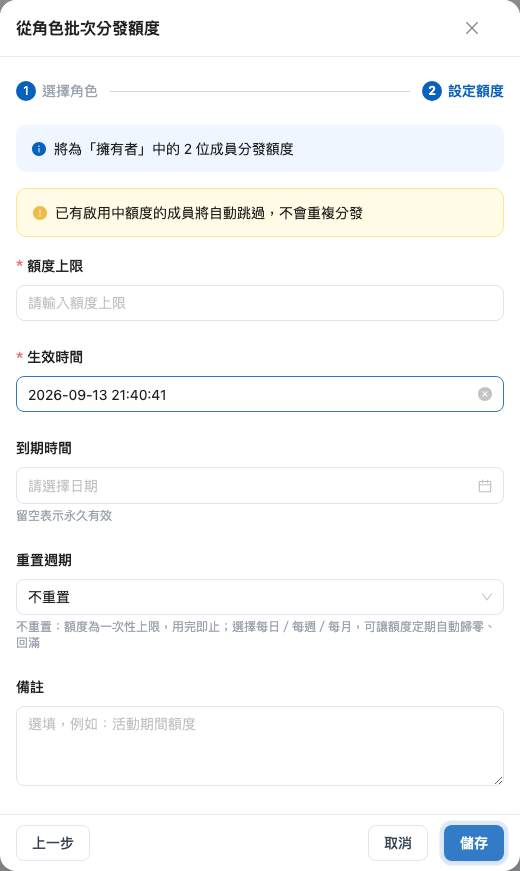
  1. Click the Distribute Quota button in the upper right corner

  2. Search for the target member by name or email in the search box

  3. Enter the Credits cap (spending ceiling)

  4. Set the validity period (you can set an expiration date or choose permanent)

  5. Click Confirm to complete the distribution

Distribute Credit Quota dialog
Enter the Credits cap and validity period, then confirm distribution

Each member can only have one active quota at a time. For members who already have an active quota, use "Edit" to adjust it directly, or disable the current quota before distributing a new one.

Edit Quota

For members with an active quota, click Edit on their row to adjust:

  • Increase the Credits cap: Takes effect immediately

  • Decrease the Credits cap: Cannot be set lower than the member's current consumption; the system will display an error message

Disable Quota

For active members, click Disable → confirmation dialog → after confirming, the member's quota is immediately invalidated.

The effect of disabling depends on the "Quota Required" toggle:

  • Toggle is ON: The member will be unable to use AI features and needs a new quota distributed or the toggle turned off

  • Toggle is OFF: The member returns to unrestricted status, with consumption directly drawn from the organization wallet

Batch Disable Quotas by Role

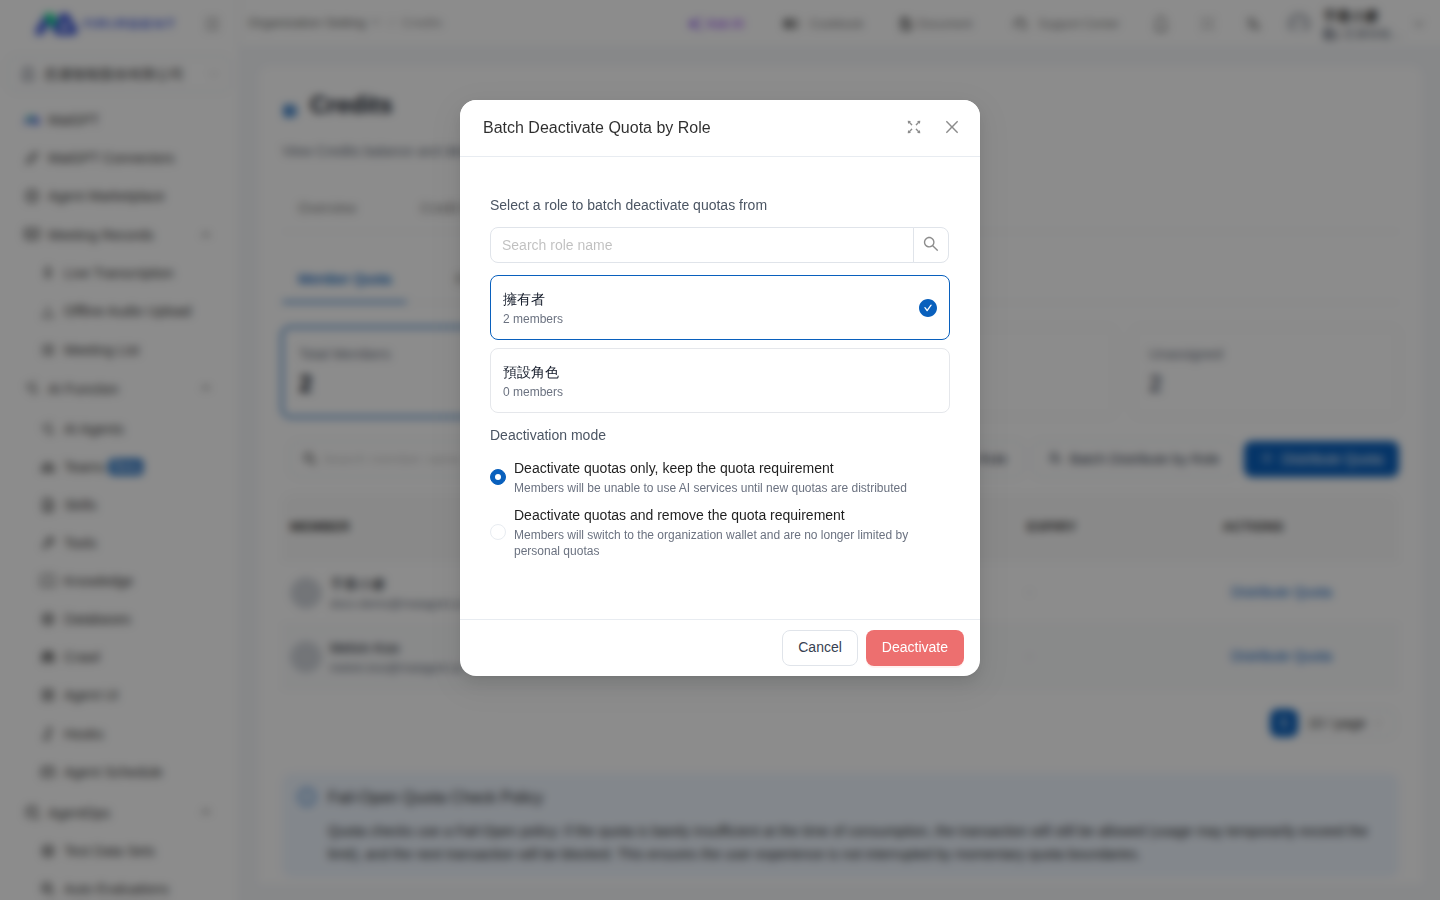
When multiple members with the same role no longer need personal quotas, administrators can disable all quotas that have been created and not yet disabled for those members at once, including quotas created in advance that have not yet taken effect. Before submitting, decide whether members should remain restricted from using Credits after their quotas are disabled:

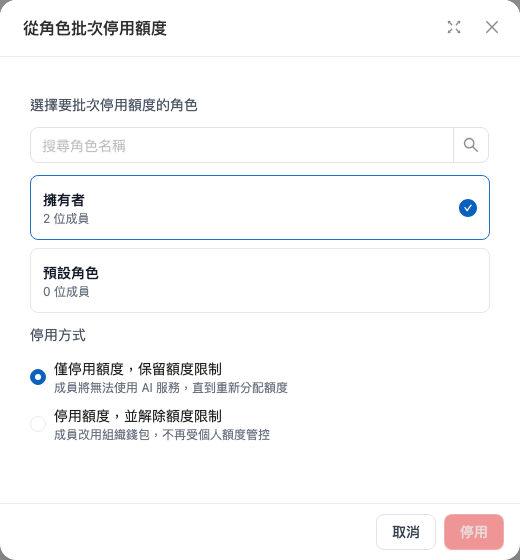
  • Disable quotas only and keep quota restrictions (default): Members cannot use AI services until they receive a new quota.

  • Disable quotas and remove quota restrictions: Members switch to the organization wallet and are no longer subject to personal quota controls.

Steps

1

On the Quota Allocation tab, select Member Quotas.

2

Click Batch Disable by Role.

3

Select the role you want to process.

Role and disable method selection dialog for batch disabling quotas by role
Select a role and decide whether to keep quota restrictions after disabling quotas
4

Under "Disable Method," choose whether to keep or remove quota restrictions, then click Disable.

5

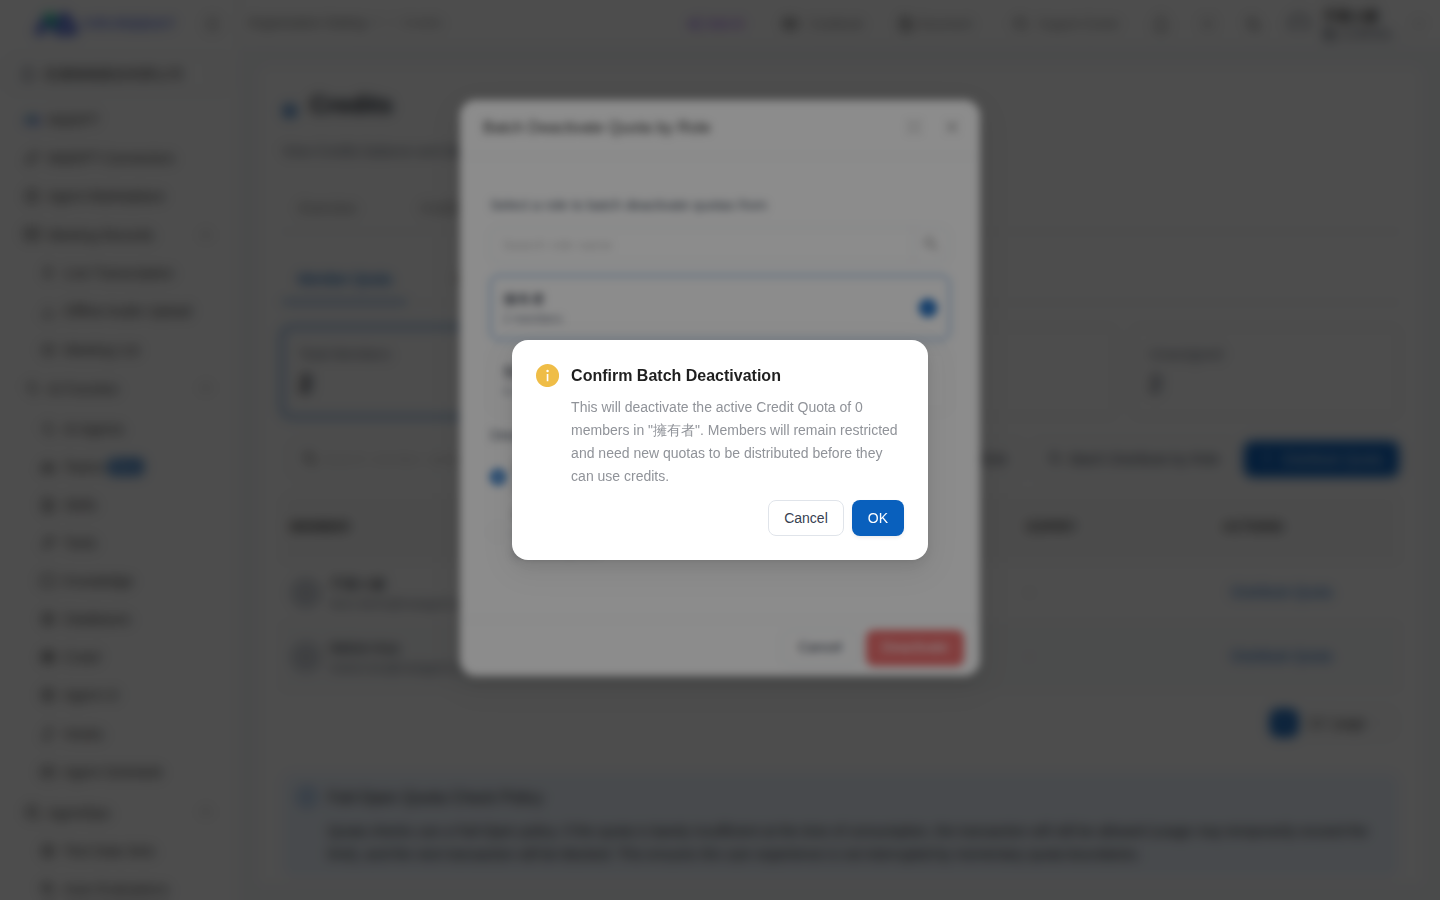
Review the number of affected members shown in the confirmation dialog, then submit after verifying it is correct. When keeping restrictions, the dialog shows the number of members whose quotas will be disabled. When removing restrictions, it separately shows the number of members whose quotas will be disabled and the number of members whose restrictions will be removed.

Batch disable confirmation dialog when keeping quota restrictions
When keeping quota restrictions, the confirmation dialog lists the number of members whose quotas will be disabled
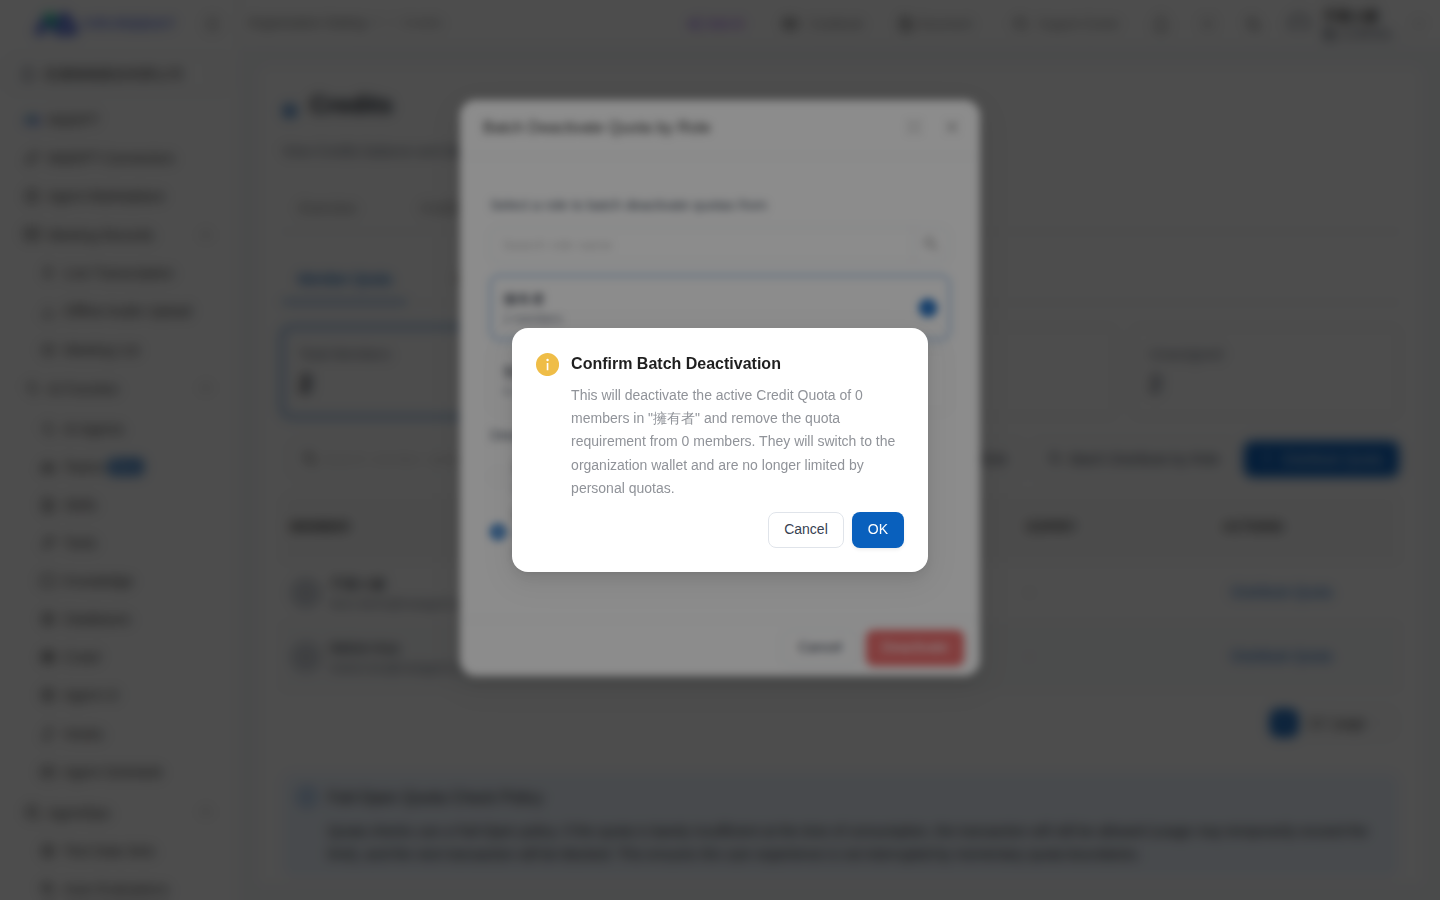
Batch disable confirmation dialog when removing quota restrictions
When removing quota restrictions, the confirmation dialog separately lists the number of members whose quotas will be disabled and the number whose restrictions will be removed
Use Case: Return a Team to Shared Credits After an Event

An administrator at MaiMai Company previously distributed personal quotas to members with the "Event Support" role to control usage during an event. After the event, she opens the Member Quotas page, selects Batch Disable by Role, and chooses "Disable quotas and remove quota restrictions." After reviewing the number of affected members, she submits the request. The quotas of members who meet the processing criteria are disabled, and their quota restrictions are removed. Their subsequent use of AI features consumes the organization wallet instead.

Batch processing applies to members in the role who are still employed, have not been deleted, and have active login accounts. Restrictions are not removed for members who have left the organization, have been deleted, or do not have active login accounts. If they are reinstated or reactivated later, they may still be in a state where a quota is required but none is available.

The two counts may differ: Members in the role who do not have a quota that has been created and not yet disabled, but who are still subject to quota restrictions, are not included in the "Disable Quotas" count. If you choose to remove restrictions, they are still included in the "Remove Quota Restrictions" count. The "Disable Quotas" count includes quotas created in advance that have not yet taken effect.

"Quota Required" Toggle

Each member row has a Quota Required toggle on the right side:

Toggle State
Description

ON

The member must have an active quota to use AI; without a quota (expired / disabled / unassigned), access is fully blocked

OFF

The member is not restricted by quota; consumption is drawn directly from the organization wallet


Members Checking Their Own Quota

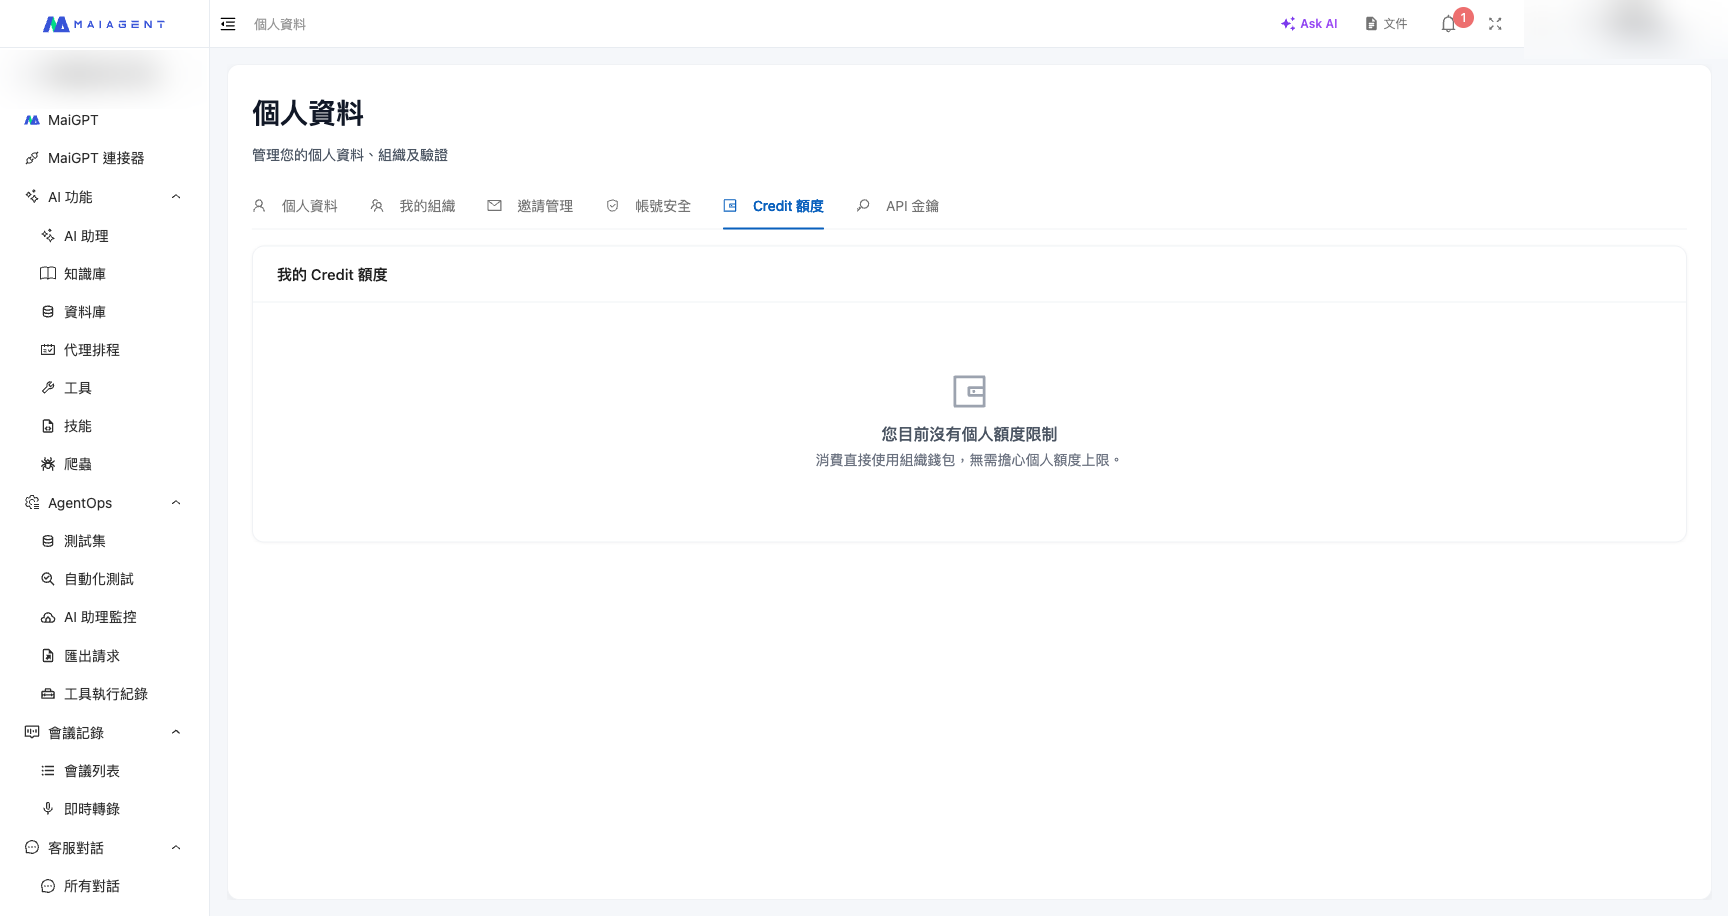
Members can view their personal Credits usage from their Profile:

  1. Click the account avatar in the upper right corner

  2. Click Personal Settings

  3. Switch to the Credit Quota tab

Members of non-Credits billing organizations will not see the "Credit Quota" tab in their Profile.

Personal Credit Quota tab
Credit Quota tab in Personal Settings

The page displays different content based on the member's quota status:

Status
Display Content

Has active quota

Progress bar (used / total cap), remaining Credits, expiration countdown

Quota required but none available (expired / disabled)

Red alert: "You need a quota to use AI services. Currently no quota is assigned, or your quota has expired. Please contact your administrator to distribute a new quota."

Quota not required

Gray notice: "You currently have no personal quota limit. Consumption is drawn directly from the organization wallet — no need to worry about personal quota caps."

The progress bar color changes based on usage ratio (green for low usage, approaching red for high usage) to remind members to monitor their remaining balance.


Notes

Applicable Scope

Personal quota enforcement only applies to the following entry points:

  • Operations through the MaiAgent admin dashboard

  • API Key calls to the /completions/ endpoint

  • Knowledge Base uploads and document processing

WebChat channels are not subject to personal quota limits. Messages sent through the embedded WebChat widget on websites consume the organization wallet directly, regardless of whether the visitor is logged in.

Fail-Open Mechanism

To prevent service interruptions caused by quota boundary calculation issues, the system uses a Fail-Open strategy:

When the remaining quota is > 0 at the time of checking, the current request is allowed through; consumption is recorded only after the AI completes its response. If the consumption exceeds the cap, the next request will be blocked. This ensures users never experience a billing failure at the same time as receiving an AI response.

Last updated

Was this helpful?