> For the complete documentation index, see [llms.txt](https://docs.maiagent.ai/llms.txt). Markdown versions of documentation pages are available by appending `.md` to page URLs; this page is available as [Markdown](https://docs.maiagent.ai/conversations/web-chat/website.md).
# 串接對話平台:網站
## 一、進入設定頁面
### 1. 路徑一:新增網頁客服對話
點擊左側選單 「 客服對話 > 對話平台」 ,點選右上角的 「+串接對話平台」,選擇平台 「 Website 」
### 2. 路徑二:AI 助理關聯對話平台
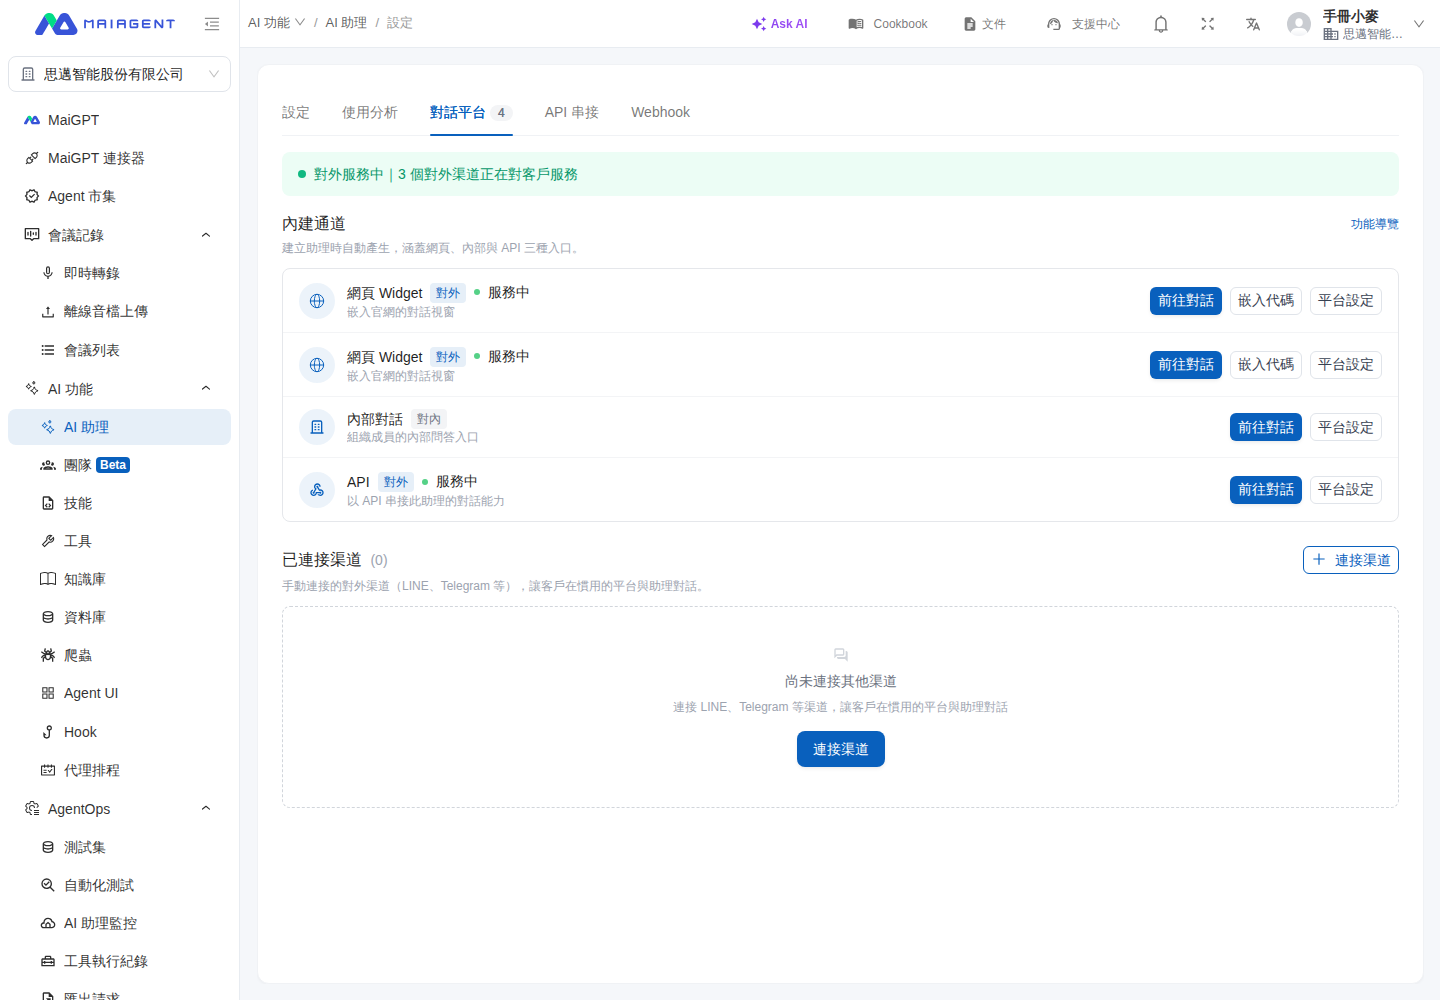
進入左側功能欄的 AI 功能 → AI 助理,選擇要設定的助理,再切換到 對話平台分頁。找到要調整的網頁對話平台後,點選 平台設定。
從 AI 助理的對話平台分頁點選「平台設定」。
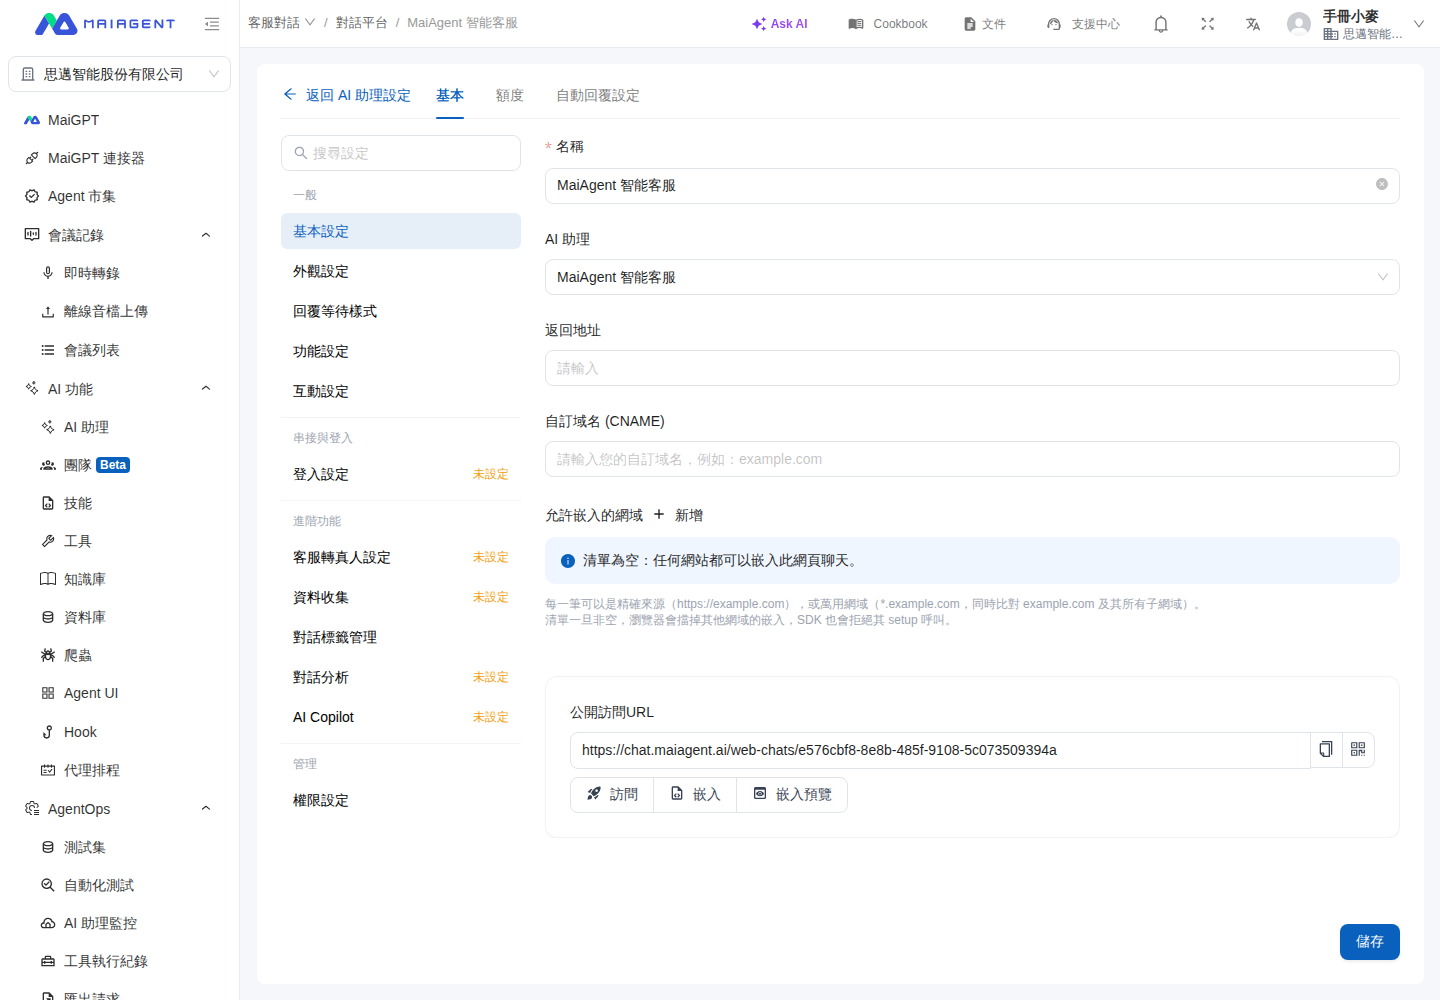
完成設定後,點選頁面上方的 返回 AI 助理設定,即可回到原助理的 對話平台分頁。在 基本、額度與 自動回覆設定之間切換時,這個返回入口仍會保留。
設定完成後,可直接返回原本的 AI 助理設定頁。
{% hint style="info" %}
只有從 AI 助理的 對話平台分頁進入時,才會顯示 返回 AI 助理設定。若是從左側選單的 對話平台直接進入,頁面維持原本的導覽方式。
{% endhint %}
#### 使用情境:調整網站客服後回到助理
客服主管要為「產品諮詢助理」更新網站客服設定。她在這隻 AI 助理的 對話平台分頁點選 平台設定,完成調整後點選 返回 AI 助理設定,回到同一隻助理的對話平台清單,繼續檢查其他客服入口,不需要再從 AI 助理清單重新尋找。
### 3. 路徑三:對話平台操作
左側功能欄中的 「 客服對話 > 對話平台 」,選擇您想要設定之 AI 助理,點選 「 操作 」 圖示即可進入對話平台配置。
## 二、基本設定
「基本」分頁裡「一般」群組的五個分類,各有專頁詳細說明:
### 1. 基本設定
平台名稱、AI 助理、返回地址、自訂域名、允許嵌入的網域、公開訪問 URL 與三種嵌入方式,請見[基本設定](/conversations/platform-settings/basic-settings.md)。
#### 允許嵌入的網域
嵌入白名單的運作方式、設定步驟與啟用前檢查清單,請見[基本設定:允許嵌入的網域](/conversations/platform-settings/basic-settings.md#allowed-embed-origins)。
### 2. 外觀設定
Logo、大頭貼、顯示設定與淺色/深色主題配色,請見[外觀設定](/conversations/platform-settings/appearance-settings.md)。
### 3. 功能設定
是否啟用、允許上傳檔案、引用文件、OCR、工具顯示模式、提問集選項顯示模式與 AI 感知設定,請見[功能設定](/conversations/platform-settings/function-settings.md)。
### 4. 互動設定
開場白、對話開始問題、開場白選項納入 Agent 上下文、對話顯示設定、滿意度問卷與額度用完提示訊息,請見[互動設定](/conversations/platform-settings/interaction-settings.md)。
#### 開場白選項納入 Agent 上下文
開啟前後差異、適用情境與注意事項,請見[互動設定:開場白選項納入 Agent 上下文](/conversations/platform-settings/interaction-settings.md#include-greeting-in-context)。
### 5. 登入設定
**設定 SSO 登入來源**
* MaiAgent 目前支援透過 Keycloak 整合實現 SSO(Single Sign-On)服務
* 於 「 登入來源 」 下拉選單中進行切換
* 選擇使用 Maiagent 或 Keycloak 作為身份驗證方式
**嵌入端免登入對話**
若您把 Web Chat 嵌入自家網站,且使用者已在您的網站登入過,可開啟 「 允許嵌入端以 Source ID 免登入對話 」 讓他們直接對話。設定方式與簽章串接說明請見 [以聯絡人 Source ID 免登入對話](/conversations/web-chat/source-id-access.md)。
## 三、自動回覆設定
您可以在此設定機器人回覆時間段。
* 點選日期旁的開關鈕:選定一周中的哪幾天回覆。
* 設定時段:選定開始的時間與結束的時間。
* 新增時段:如果有多個時段要設定,可按下 「 +新增時段 」 來新增,並設定時段。
---
# Agent Instructions
This documentation is published with GitBook. GitBook is the documentation platform designed so that both humans and AI agents can read, navigate, and reason over technical content effectively. Learn more at gitbook.com.
## Querying This Documentation
If you need additional information that is not directly available in this page, you can query the documentation dynamically by asking a question.
Perform an HTTP GET request on the current page URL with the `ask` query parameter, and the optional `goal` query parameter:
```
GET https://docs.maiagent.ai/conversations/web-chat/website.md?ask=&goal=
```
`ask` is the immediate question: it should be specific, self-contained, and written in natural language.
`goal` is optional and describes the broader end goal you are ultimately trying to accomplish on behalf of the user. GitBook uses it to tailor the answer towards what is most useful for that goal.
The response will contain a direct answer to the question and relevant excerpts and sources from the documentation.
Use this mechanism when the answer is not explicitly present in the current page, you need clarification or additional context, or you want to retrieve related documentation sections.